- Have a Question? 1.800.832.7111
- Contact Us
- 0
Technical Blogs
Helpful posts by Lonseal's Technical Team
Click one of the following items to jump to that post:
2025
7/7/2025: Recommended Adhesives for Vehicle and Marine Installations
2022
4/22/2022: Hand Sanitizers
2/7/2022: Entrance Mats
2021
8/2/2021: Causes and Prevention of Plasticizer Migration
2020
11/3/2020: Scratch and Gouge Repair Options for Lonseal Flooring
7/6/2020: Protecting Your Lonseal Flooring from Start to Finish
3/31/2020: Eliminating Glaze from Heat Welded Seams
Recommended Adhesives for Vehicle and Marine Installations
7/7/2025
Installations in ambulances, vans, RVs, boats, and other similar locations, which we will collectively call vehicles in this blog post, present unique challenges compared to buildings when installing flooring. Many flooring and adhesive products have strict guidelines for temperature and humidity ranges to avoid issues during and after installation, and require the space to be conditioned, in order to stay within these ranges. This is easy to do in a building installation, but not so much for those in vehicles, since it is rare for them to have the capability to maintain constant conditioning.
Vehicles are typically kept outside or in areas that remain unconditioned, like a garage, which can expose them to temperature extremes, outside of the recommended 65 – 85 °F (18.3 – 29.4 °C). Think of a closed-up vehicle during a hot, humid summer or buried overnight during a snow storm. Installation conditions are most critical for acrylic-based adhesives, as they contain some percentage of water, and this water is greatly affected by its environment, even after installation. While Lonseal’s #813 Sheet Vinyl Adhesive is great for those commercial building installations, it is not ideal for vehicle installs, since it is acrylic-based. This is why you may have been told by a Lonseal representative that the use of #813 is not recommended for vehicles. As the interior experiences large temperature swings, the adhesive’s bond can weaken, allowing the flooring to expand or contract. This can result in issues like pull-back, buckling, or bubbling. Once the adhesive fails, the installation fails.
Another factor to consider is that vehicles may have a wider range of substrates, like metal or fiberglass. Metal and fiberglass are non-porous, which can be a problem for acrylic-based adhesives, and impact its ability to properly cure when sandwiched between the non-porous substrate and the non-porous sheet vinyl.
This is why Lonseal recommends the use of its #650 Epoxy Adhesive, #400 Contact Adhesive, or Lontape for vehicle installations, as they are not acrylic-based, can handle those extreme temperature fluctuations once fully cured, and are better suited for more types of substrates.
The #650 Two-Component, Solvent-Free Epoxy Adhesive is our primary recommendation due to its performance in extreme conditions once cured. It is also our most versatile adhesive, use for interion spaces under heavy static or dynamic rolling loads, or full exterior installation of our Londeck exterior decking products. This adhesive is ideal for vehicle installations, and many other specialty installs. It was designed as a wet-set adhesive to eliminate the open time of traditional epoxies, allowing for immediate installation of the flooring.
The #400 Contact Adhesive performs just as well as the #650, but being a contact adhesive, it has an immediate and aggressive bond. This means that once the flooring is placed, it cannot be repositioned without weakening or destroying the adhesive’s bond. Lonseal recommends applications using the #400 be kept small enough to maintain complete control over the flooring. This makes it ideal for use at vertical areas, where the #650 cannot be used, or small areas, like hatches or panels. An added benefit, is that it may be used with a sprayer set up, for quicker, easier application.
The Lontape has the benefits of the #650 and #400 combined into a single double-face tape. Its cured strength rivals that of the adhesives, can be used horizontally, vertically, or any angle in between, and is quick and easy to apply, with minimal clean-up or mess. Additionally, there is no pot life or open time to worry about. The tape can be placed at your leisure, and the liner removed only when ready to install the flooring. While the cost per square foot may be higher when compared to the #650 or #400, the benefits may offset the cost, if easy install and clean-up are more important.
Vehicle installations may not be limited to Lonseal-branded adhesives. Lonseal recommends its adhesives due to extensive testing and historical performance, but Lonseal has worked with other adhesive manufacturers to determine alternatives for vehicle installations.
If you are a boat-owner, work in, or are familiar with the marine industry, then the name West System® may be recognizable. Lonseal worked directly with Gougeon Brothers, Inc. to establish recommended application methods for their West System® Epoxy. The system allows for any size batch to be created, so you can mix only what you need. Use of this system also provides the opportunity to use the West System additives that speed up or slow down the curing process, which may be useful when installing in cooler or warmer environments. While West System is well known in the marine industry, it can just as easily be used in other vehicles.
Another alternative adhesive is Tensorgrip® P809 from Quin Global. Quin Global performed extensive testing with Lonseal’s flooring and determined the P809 was well-suited for vehicle installations. P809 is a spray adhesive, specifically designed for use with vinyl, and is CA compliant.
Hand Sanitizers
4/22/2022
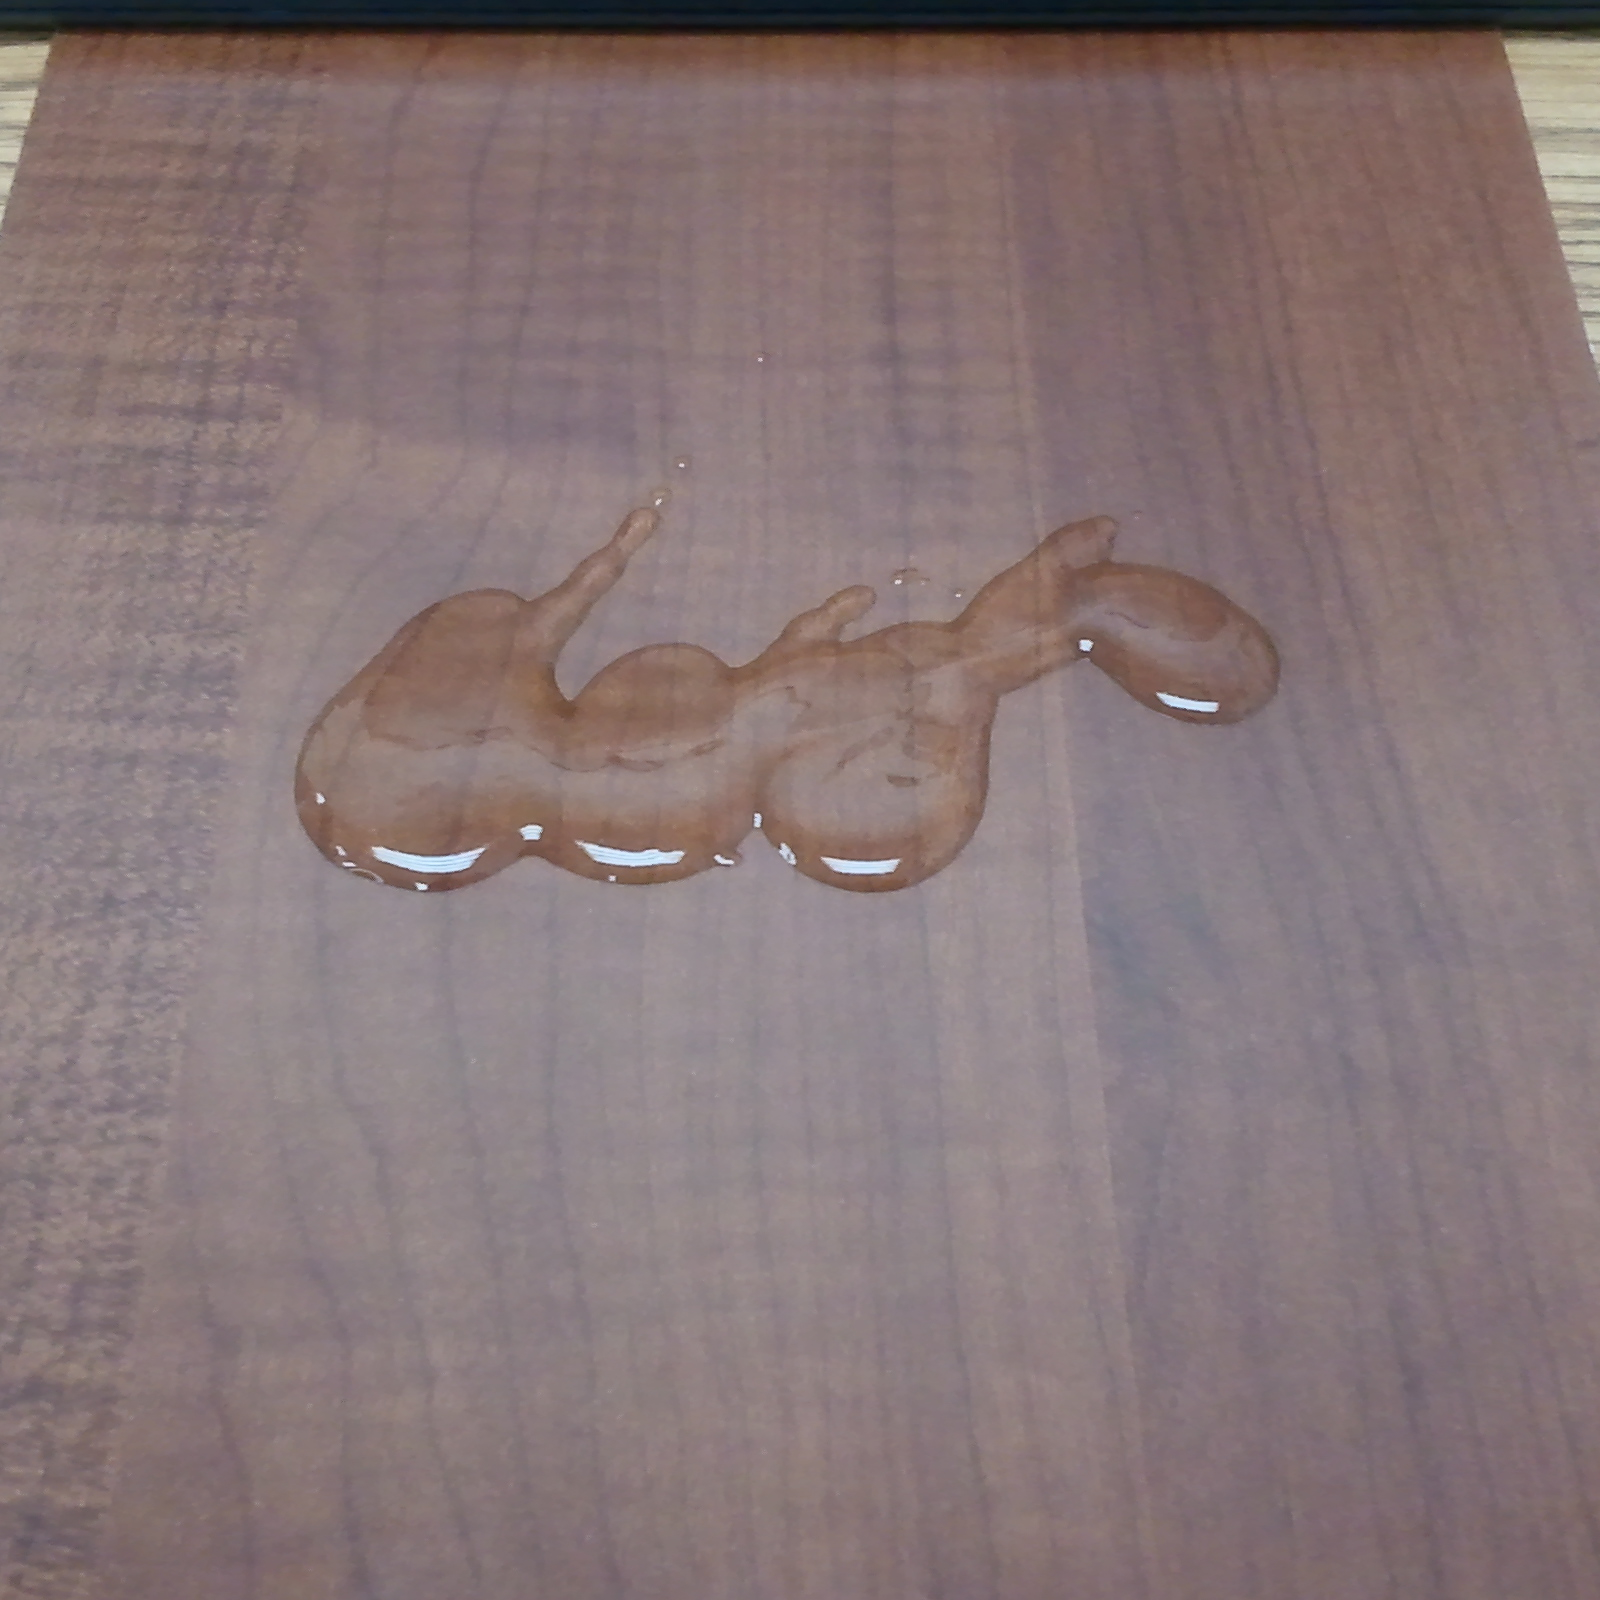
Use of alcohol-based hand sanitizers has drastically increased since COVID-19 arrived. This increase in use means an increased likelihood some of it will be spilled or dripped onto your floor. With Lonseal’s Topseal®, our factory-applied urethane finish, your Lonseal flooring should not see any adverse effect if this occurs.
In order to confirm the impact alcohol-based hand sanitizers would have on Topseal, we performed two tests, one in-house and one using an outside laboratory.
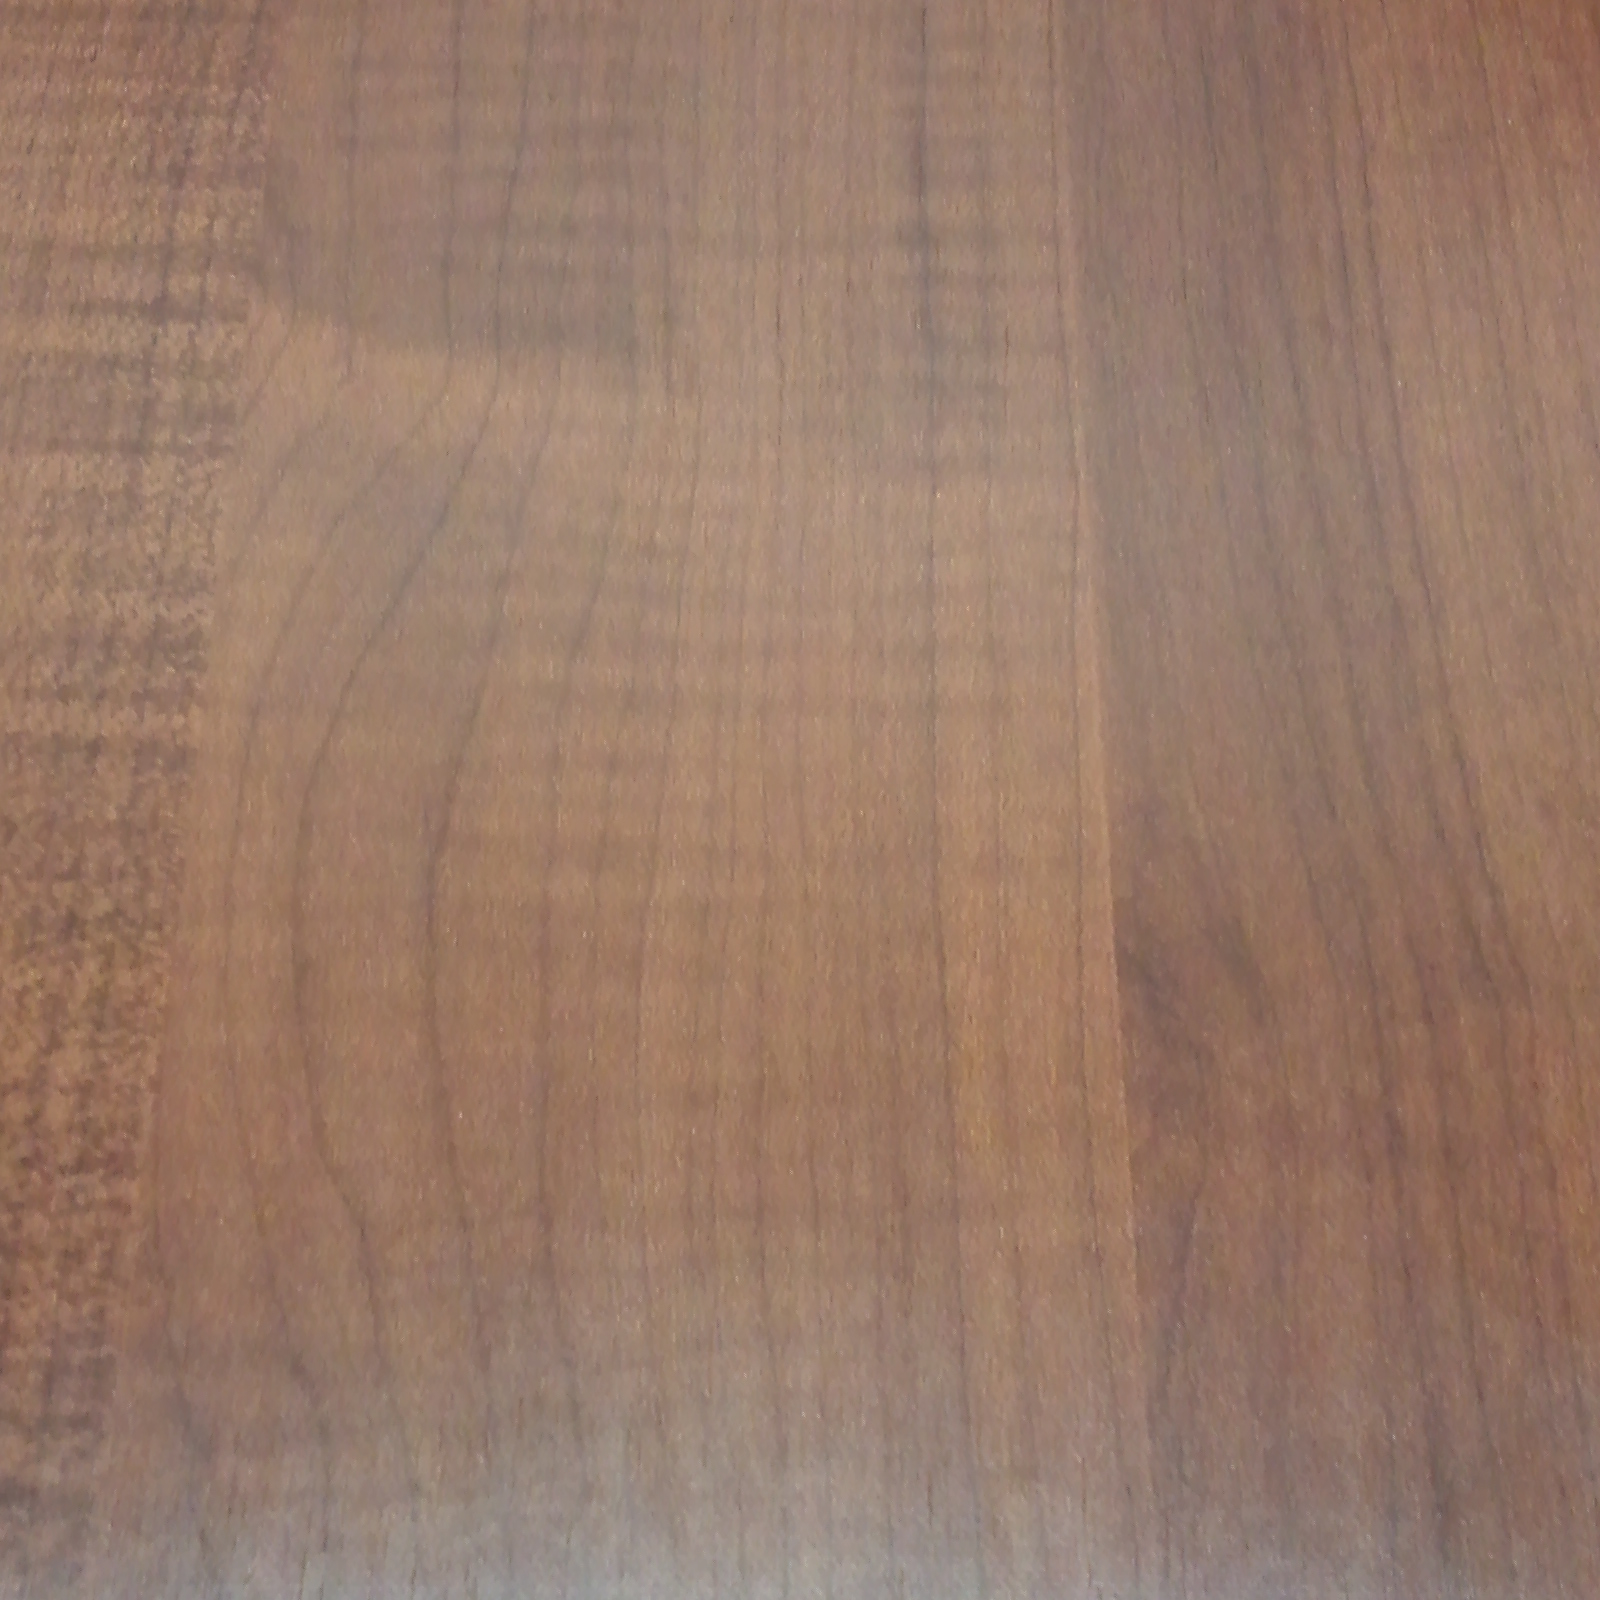
Our in-house test was simple. We applied a good amount of hand sanitizer to the surface of our floor and left it there until it fully evaporated, which took 12 days. The residue left behind was wiped away using a microfiber rag and a neutral pH cleaner. Below are the photos from this test. Please remember that any spills should be cleaned up immediately. This test was just an extreme example of the spill being left alone for an extended period in order to illustrate Topseal’s performance.


The second test was ASTM F925 performed by a 3rd party laboratory. The purpose of ASTM F925 is to see how a specific reagent, in this case an alcohol-based hand sanitizer, affects the floor. Upon completion of the test there was no change to the floor at either duration, further supporting that alcohol-based hand sanitizers should not damage Topseal.
Should you have any questions about Topseal’s performance or our testing, please feel free to reach out.
Entrance Mats
2/7/2022
The winter months can present additional maintenance challenges that are not normally seen during the rest of the year. Floor traffic during the colder seasons can introduce unique debris, such as snow and de-icing salts, onto your floor that could impact its performance if not addressed. Ensuring the use of properly maintained entrance or walk-off mats will help address these winter challenges, and should be a part of every facility’s maintenance program to protect your floor year-round.
As mentioned in our earlier blog “Protecting Your Lonseal Flooring from Start to Finish“, preventative maintenance helps keep your floor in its best condition. One critical component of preventative maintenance is the use of properly maintained entrance mats. Entrance mats are designed to extract soiling, moisture, and debris off of shoes that would otherwise be tracked in from locations outside and onto the floor.
Many things can, and will, be caught up in the soles of shoes. Dirt and debris can act like sandpaper on a floor’s finish and wear layer. Asphalt can contain chemicals that may permanently discolor your floor. Ice melting salts can attack a floor’s finish. The use of entrance mats will allow people who enter your facility a way to remove as much of these contaminants as possible, but there are things to consider.
First, the size of your entrance mats should be sufficient to cover your entryway and be able to handle the volume of expected foot traffic entering your facility. Some facilities may even consider extra mats to help deal with the extra moisture during the winter months or wet seasons.
Second, the type of mat used will be critical if it is placed in direct contact with vinyl flooring. The mat must be non-rubber and non-staining. Many commercially available entrance mats will have rubber backing. This is not suitable for vinyl flooring and will cause plasticizer migration. To learn more about plasticizer migration, please read our earlier blog “Causes and Prevention of Plasticizer Migration“.
Third, entrance mats should not only be used at a facility’s primary entrance, but should be used at all entrances into a building. The idea of an entrance should also be expanded from only outdoors to inside. Consider a warehouse with concrete floors and its attached offices with vinyl floors. The use of entrance mats at the entries from the warehouse into the offices will also help prevent soiling from the warehouse being brought into the offices.
Last, but certainly not least, entrance mats must be properly maintained. This means they must be cleaned regularly. The mat can only handle so much soiling or absorb so much moisture before it stops being effective. The frequency of mat cleaning should be a part of your facility’s maintenance program and based on the entrance’s location and amount of traffic. There are also services available that will swap out entrance mats on a regular basis.
Every facility is different in its needs and there are a number of different manufacturers of entrance mats. If you already have a supplier or service that provides mats, you are already on your way to protecting your floor. If you need assistance in sourcing mats, Lonseal highly recommends contacting 1877FloorGuy. They offer a variety of vinyl-backed mats and their knowledgeable staff can help you get the best mat for your needs. You can contact them by visiting their website at the link below.
One last item to consider. Some facilities will have carpet installed at entrances, whether in a small area or wall to wall. If carpet is installed this way, it is acting as a giant entrance mat, whether it is intended or not. This carpet will require a larger effort to maintain, as it too will hit a point where it becomes saturated with soiling. Instead of dealing with a small entrance mat, an entire carpeted area would need to be cleaned. Use of entrance mats, even at these locations, may make things easier on your maintenance program.
Causes and Prevention of Plasticizer Migration
8/2/2021
Plasticizer migration may not be a term familiar to those outside of the vinyl flooring industry, and you may not learn about this term until you see your flooring discolor and cannot find the source. Plasticizer migration may also be referred to as antioxidant staining, since the antioxidants found in rubber-based products are what chemically react with vinyl, causing this discoloration. This occurrence is not unique to our sheet vinyl, but to all vinyl flooring products.
Antioxidants help rubber products stay pliable and extend their life, but the chemicals can migrate out of the rubber over time and into surrounding materials. If a product made of rubber is in contact with vinyl, the antioxidants from the rubber create a chemical reaction that will leave a permanent stain.
The rubber-based products that may come into contact with your flooring will depend on the installation location, but they can include walk-off or entrance mats, wheels, tires, or furniture protectors. Any object or furniture that will come into contact with the flooring should be non-rubber and non-staining. For carts, chairs, gurneys, etc., the manufacturer should be contacted to confirm their wheel options that are compatible with vinyl flooring. For situations with static displays that do not have the option of non-rubber or non-staining components, such as a car exhibit, the use of clear acrylic sheets can be used in the area where the components or tires will contact the floor. The clear acrylic sheets will still allow the flooring to be visible.
Asphalt may also contain antioxidants that can then be tracked onto the vinyl, causing plasticizer migration. Use of properly maintained walk-off or entrance mats and regular maintenance will help reduce the chance the chemicals are brought in from outside or left on the floor long enough to cause staining. For vehicle installations of vinyl flooring, the use of shoe brushes may be an alternative to mats, in addition to regular cleaning.
The images below are examples of plasticizer migration staining.
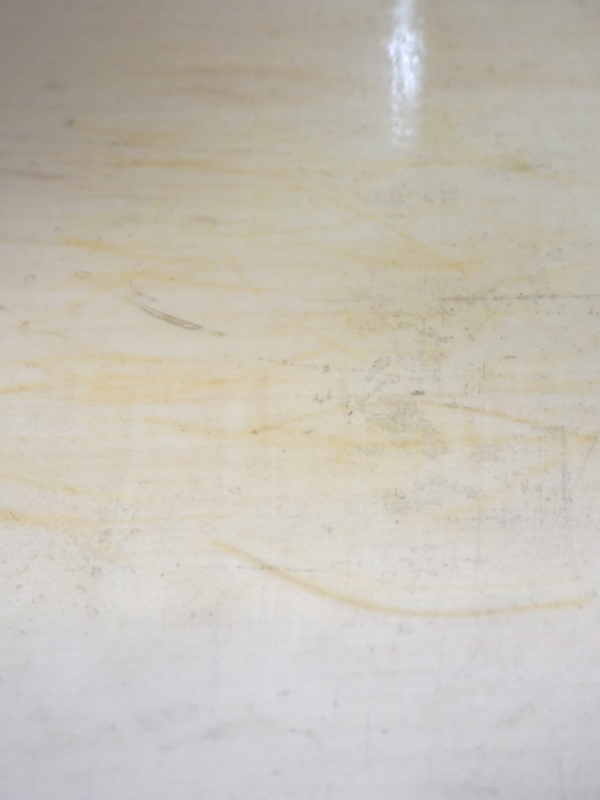
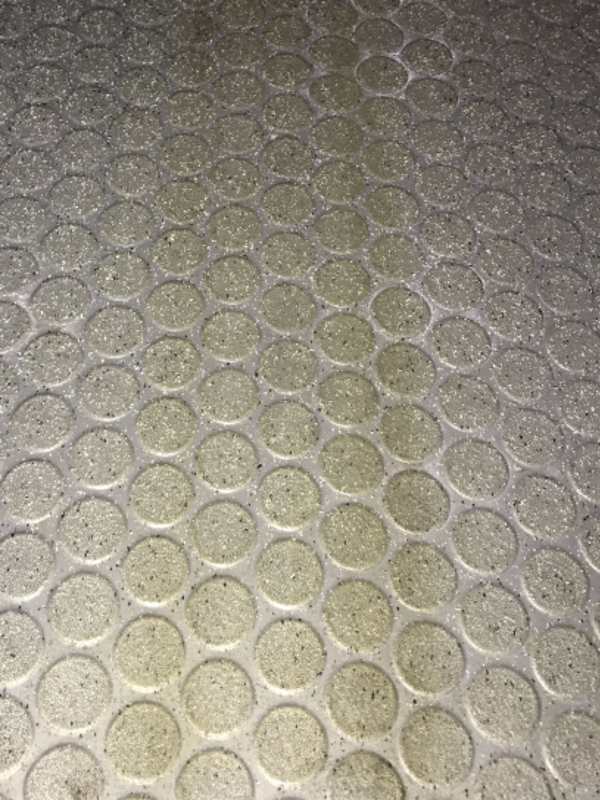
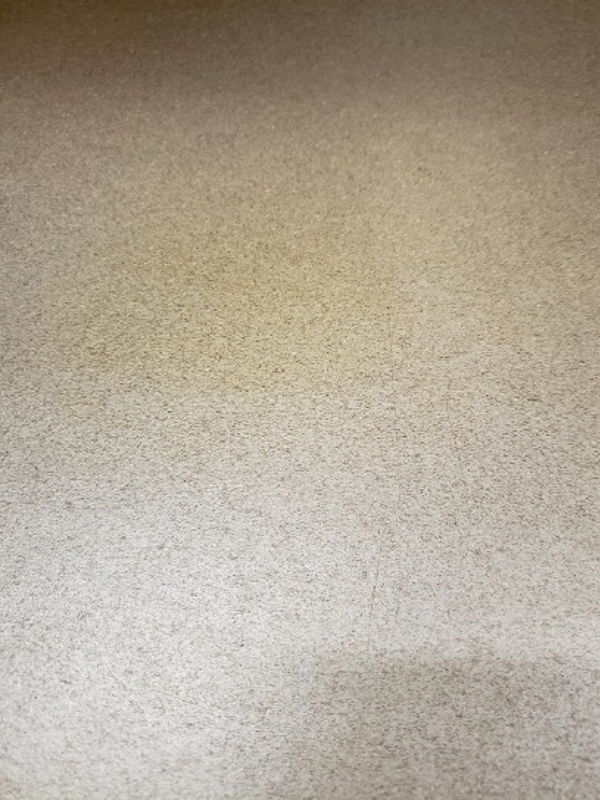
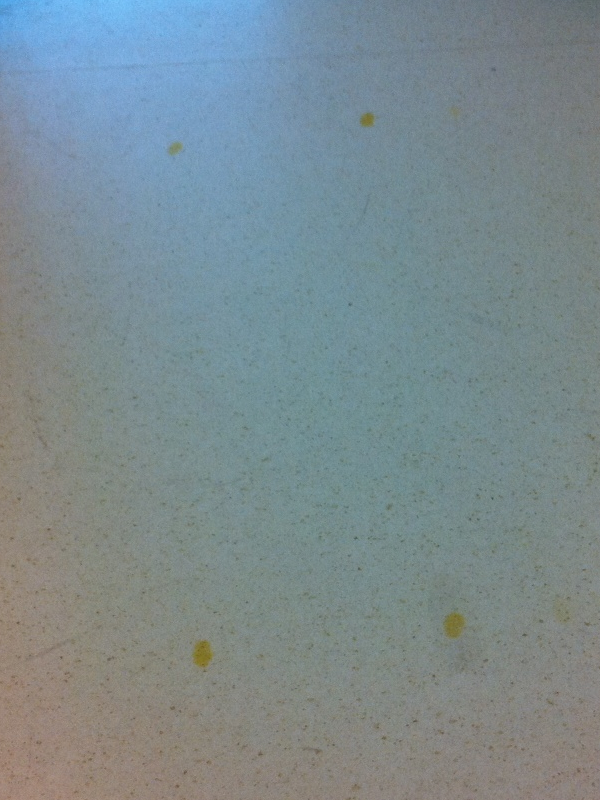
The time frame for plasticizer migration staining to occur will vary based on many factors. The concentration of antioxidants in the item contacting the vinyl is one. Temperature is another, since elevated temperatures will speed up the chemical reaction.
The staining will be more noticeable in lighter colored flooring, but will still occur with any floor color. While it may take longer for the issue to become apparent with darker colored flooring, the effect is the same.
While the application of a finish may slow down the reaction, it should not be solely relied upon for mitigation. With enough time, plasticizer migration could still occur. The best form of mitigation will be to use vinyl-compatible materials and have a proper maintenance program in place.
Should you have specific questions, please feel free to contact our Technical Department.
Scratch and Gouge Repair Options
11/3/2020
Accidents can happen during or after installation where the flooring becomes scratched or gouged. In this post, we are going to cover some repair options for these types of damage.
Lonseal’s Technical Department is available to assist should you have any unique situations not covered in this post, or if you have any other questions.
It is recommended that our unfinished flooring receive a finish to help ease maintenance, as foot traffic, soiling, and debris would make contact with the finish first rather than the flooring’s wear layer. If a floor finish is applied, repair of minor scuffs and scratches could be as simple as applying additional coats of finish. Recommendations can differ from one manufacturer to another, so it is best to contact the manufacturer of the finish for additional support. The Periodic and Restorative Maintenance sections in our Unfinished Flooring Maintenance Guide contain some general information on the process of adding additional coats of finish, as well as stripping and refinishing.
Lonseal’s factory-applied Topseal® or High Gloss Urethane finishes provide durability and scratch resistance. Floors with either of these finishes are not designed to have their finishes stripped, so superficial damage to the finish can only be repaired by using a field-applied urethane finish. The companies noted in our Recommended Maintenance Products chart should be contacted for guidance on which of their products and how many coats would be best, based on the observed damage at the installation location. Additional information on our urethane finishes can be found in our High Gloss Finish and Topseal Maintenance Guides.
To avoid variations in the floor’s gloss level, it may be necessary to apply finish over the entire area, not just the portion that was scratched. This is especially important when applying a finish to our Topseal or High Gloss products. The manufacturer of the finish may have instructions for spot removal and reapplication of their products, but the repaired area could still stand out.
The applied floor finish may not completely eliminate all visible scratches, but it should help diminish their appearance. It will also ensure the flooring is properly protected.
Deep cuts or gouges, specifically those that go through the wear layer, can be repaired by heat weld. This type of repair will be very similar to heat welding seams, except you would only groove the length of the cut or gouge. Ensure the area is clean and free of debris. Avoid getting any moisture into the cut or gouge, and if it is damp, allow the area to sufficiently dry. Once the affected area is clean and dry, the cut or gouge can be grooved using a hand groover. A straight edge or curved guide should be used to ensure the groove is centered on the cut or gouge as much as possible. While freehand grooving is also an option, care should be taken to avoid damaging parts of the floor not in need of repair.
After grooving, perform a heat weld per our Welding Thread TDS. Note that our Topseal and High Gloss Finish Flooring require the use of a urethane nozzle (part #ZZ65), but this same nozzle may be used on our other floors to minimize any shine at the sides of the seam that can occur when using a standard speed nozzle (see our earlier post about this here.) To avoid damaging the floor, protect the areas at the beginning and end of the weld. This will help prevent any unintended scorching or damage to the flooring. This can easily be done with one or two layers of painter’s or masking tape. You may also want to consider applying the tape along either side of the grooved seam to help minimize any potential damage while repairing the floor. This could be especially helpful with non-linear repairs.
Our more heavily embossed products (e.g. Lonplate I and Lonplate II) cannot be properly heat-welded, so this method of repair is unfortunately not an option.


Be aware that a repaired cut or gouge has the potential to stand out, and will not always blend in with the floor. It may not be the most attractive repair, but it will help ensure your floor is protected. An unrepaired cut or gouge will collect soiling, and if it is deep enough, could allow moisture intrusion beneath the flooring. If there are numerous cuts or gouges in one area, it may be more cost-effective to remove and replace the damaged section of flooring, sometimes up to the nearest seam.
Protecting Your Flooring from Start to Finish
7/6/2020
Protection of your new Lonseal flooring begins the moment it arrives, and each phase of the installation process comes with its own best practices to keep your floor performing optimally. In this post, we are going to review some specific recommendations and encourage our readers to browse the technical content on our website as well as contact Lonseal’s Technical Department if they have any questions.
Pre-Installation
One of the most important pre-installation steps to take once you receive your flooring, but perhaps not the most obvious, is to store the material standing on end. All material should be inspected after it arrives to confirm there was no damage during shipping. Leaving the flooring on a pallet for too long could lead to permanent deformation or damage.
Additionally, the installation could be delayed if any inspection for shipping damage is put off until just before installation. If more material is needed for the job, you will have to wait both the time it takes to receive new material and the acclimation time.
The material should not be stored at the jobsite unless the general contractor has provided a secure area that meets Lonseal’s storage requirements. The material has the potential to be damaged by other trade work if it is brought to the jobsite too early or stored inappropriately.
Any dedicated storage area must sufficiently protect the material from direct sunlight and the elements. The temperature of the storage area should also be maintained between 65 °F and 85 °F. Storage outside of this range could result in longer than normal acclimation periods or product damage. Additional information on handling and storage can be found in the technical documentation available on our website.
During Installation
No other trades should be allowed in the area while the installation is taking place.
Any spilled or excess sundry on the surface of the flooring must be cleaned up immediately. Some adhesives will be extremely difficult or impossible to remove once cured.
Be sure to review the technical and safety data sheets for our sundries prior to use. This will help make sure any items needed for cleanup will be on hand.
Post-Installation
Other trades must continue to be kept out of the installation area until the installer releases it. In most cases, the adhesives will be fully cured after 72 hours and the installer will have finished any seam installation and initial maintenance. However, jobsite complications can occur, so always check with the installer before entering the area.
Lonseal flooring with Topseal is ready to go after initial clean-up, but some floors will require the application of a finish. Applying the finish before releasing the installation area will help ensure adequate protection is in place when it is turned over to the customer.
Lonseal always recommends that the flooring be the last finish installed. This will avoid the possibility of damage from paint spills, dropped tools, or adhesive displacement caused by heavy equipment or point loads.
In situations where trades will need access to an area with installed flooring, Lonseal’s main recommendation for protection will be 1/4 in. thick minimum plywood. This will help disperse any loads from ladders or scaffolding. Products like cover guard® and Ram Board® are great for light traffic or work, but are also not able to sufficiently displace heavy loads. The ideal protection would be one of these products with 1/4 in. thick plywood used as pathways for heavy rolling loads or in areas where ladders or scaffolding will be needed. Thin wood-based products, such as hardboard, will not have sufficient load dispersion, and the use of paper with certain dyes can cause permanent staining on the surface of the flooring.
When the time comes to move equipment and furniture onto the newly installed flooring, exercise care, and use best practices. Lonseal’s flooring is resilient, but not impervious to damage. Not many floors can withstand a fully loaded, four-drawer file cabinet with a rusty bottom being shoved across it. Make sure any necessary protection is in place when moving in, and check that the wheels on any dollies are in good condition. Be sure to also check with the furniture and equipment manufacturers that the appropriate wheels, glides, or protectors intended for resilient flooring are installed.
Continued Protection
Once the contractors have finished their work and turned over the installation to the end-user, continuing to protect the flooring will help ensure it continues to perform throughout its life. Preventative maintenance is very important, as is a maintenance program suitable for your facility. Additional information on these may be found in our Maintenance Guides, available on our website.
If you do not currently have a maintenance program in place, it is highly recommended that one be developed by working directly with your janitorial staff or service. If you do not have your own crew, a good resource for locating a service may be found at www.iicrc.org. Click on the “Locate a Certified Pro” link and select “Resilient Floor Maintenance Technician” under the Active Certifications section.
Eliminating Glaze from Heat Welded Seams
3/31/2020
In the resilient flooring industry, heat welding is the process of fusing two sheets of flooring using a hot air tool and welding thread to create a continuous flooring layer that is impervious to moisture and debris.
Lonseal manufactures welding thread for most of its 200+ flooring products. Our Welding Thread TDS covers the method of heat welding, and a videos of these processes may be found here. However, there is a specific aspect of the normal welding process that we get asked about frequently that we will cover in this post.
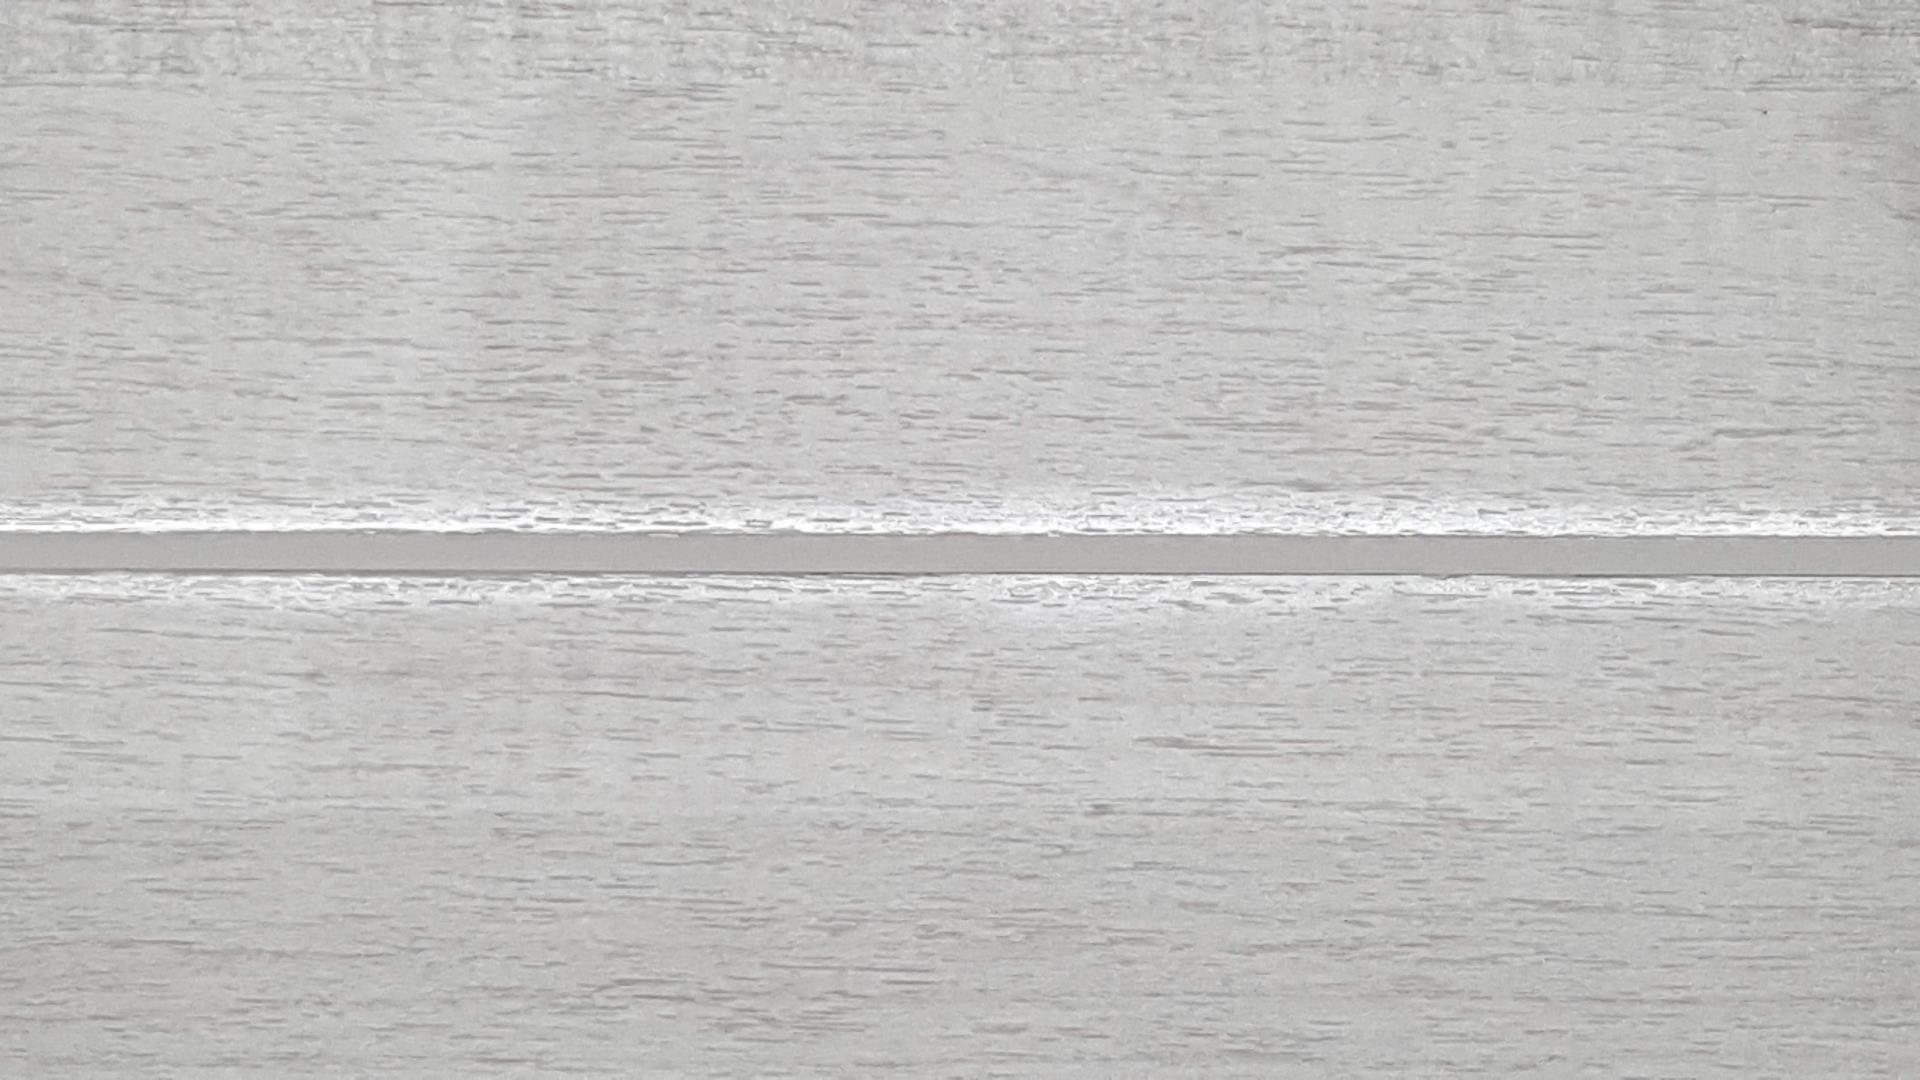
While heat welding with our standard speed nozzle (part #ZZ27) on any of our unfinished flooring, the installer may notice a glaze on either side of the seam, making them shiny in appearance. This glaze is normal, and as long as the flooring has not developed noticeable burn or scorch marks, from moving too slowly along the seam or using too high of heat, the performance of the flooring is not impacted. After the application of a floor finish, the visibility of the glaze will become less noticeable or diminish completely.
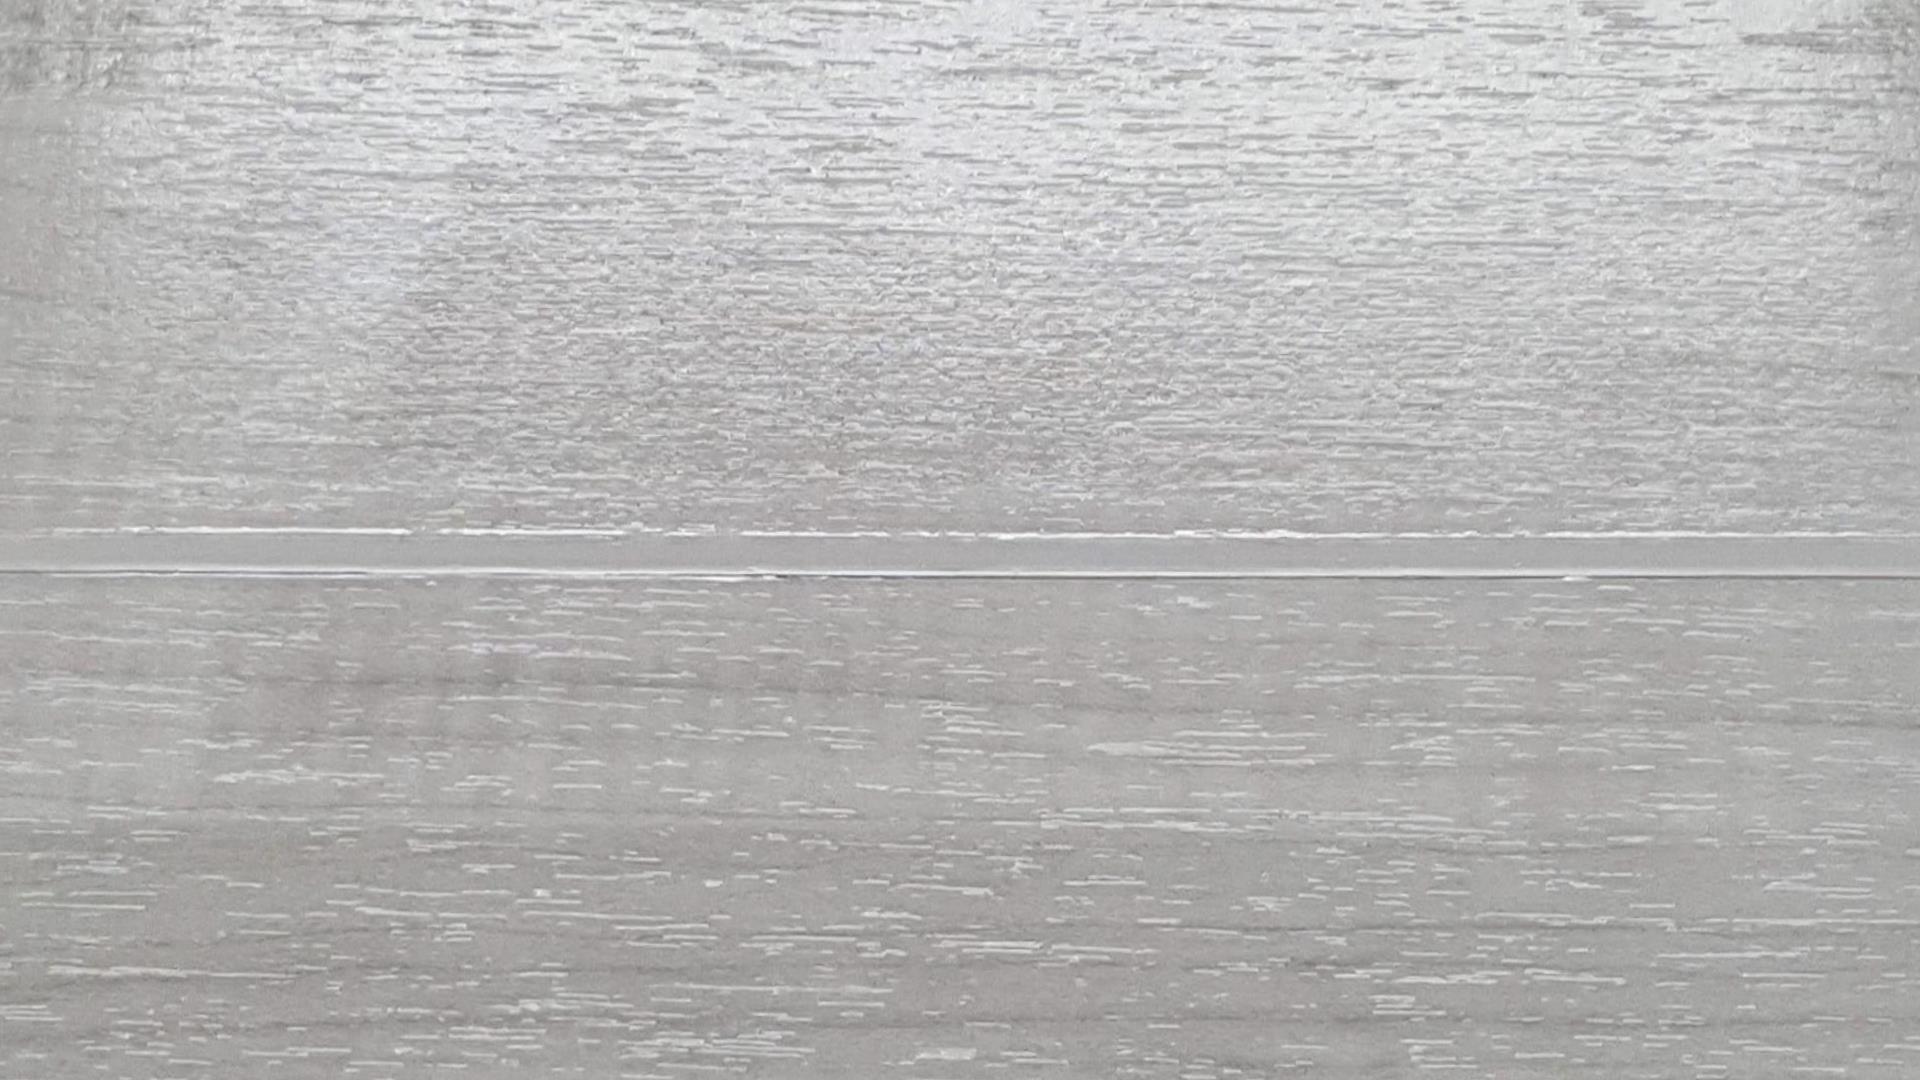
Some customers choose not to apply a floor finish after installation*, and in this case, the glaze will remain visible but may fade away over time through foot traffic and regular maintenance. In order to eliminate this initial glaze, the installer has the option to use our urethane nozzle (part #ZZ65) for the heat weld instead of our standard speed nozzle. A urethane nozzle is required when heat welding floors with a factory-applied urethane finish, such as our floors with Topseal® and high gloss factory finishes. The design of the urethane nozzle concentrates the heat into the groove of the seam, and if used to weld our unfinished floors, it can eliminate the glaze.
Remember that using the urethane nozzle will require higher heat and slower movement along the seam when compared to the standard speed nozzle. If you are unfamiliar with using a urethane nozzle, please make sure to practice on scrap flooring following the methods described in our TDS linked above. Doing so will help ensure installed flooring is not damaged, as this could require the replacement of your newly installed floor.
Below are example images of heat welds using our standard speed nozzle and urethane nozzle. Six coats of finish were applied to the sample that was heat welded with the standard speed nozzle to show how the finish minimizes or eliminates the appearance of the glaze.
A list of our floor finish recommendations and their respective Maintenance Guides may be viewed by visiting the Maintenance section of our website.
*Lonseal highly recommends all unfinished flooring receive a finish. Failure to apply a finish will make maintenance more difficult and impact the flooring’s performance. It could also lead to premature wear and impact the warranty.
Be the First to Know!
The latest news, promotions and inspiration, just for you

Thank You! You have been added to our mailing list.
Headquarters
19630 Pacific Gateway Drive,
Torrance, CA 90502
Phone: 1 (800) 832-7111 (USA only)
All other countries call: +1 (310) 830-7111